1991 SAAB 900

1991 3-door hatchback, cherry red original (re-painted); 2.1L – 4 cylinder, 16 valve
New Dash Cover and Instrument Panel Facia
After some 28 years in the southern Californian sun the dash had the classic cracks both deep and many. They ran across the dash front to back. There are several good sites describing the removal of the dash and then refurbishing it by hand. This was a bridge too far for me. The top 2 picture show the extent of the cracking. Over time a gash developed when the kids would lower the passenger seat and the headrest perfectly smacked the dash below the glove compartment. And the instrument panel fascia was cracked and peeling – overall the dash-instrument panel was looking pretty ugly.


After some debate I settled on a dash cover made to fit the 91 900 model. And I’d add a dash kit to cover the instrument panel and glove compartment door. And I’d fill and finish the gash as best as possible. So the parts are
The Dash Cover is light and came well-packaged and was surprising easy to install with a couple caveats. I needed to cut out a piece at the edge to allow the vin plate to fit snug – otherwise the cover couldn’t fit clean.


The cover is glued to the old dash with the accompanying adhesive. Best to follow the directions and place the beads of adhesive toward the center of the cover sections (like the depressed center tray section) to allow the cover to expand. I’ve noticed the cover expands a bit in direct sun/heat and there could be issues if it cannot move some. Less adhesive is probably better.
There is a lip where the cover comes over the top of the dash and extend about 1/2 in down the edge of the dash. The fit is good and the cover is thin so the lip is small. The lip ends at the top of the glove compartment fitting snug, and also at the top edge of the instrument panel. It blends well along those segments. You see the lip at the small sections inbetween the glove compartment and instrument panel, and at the left and right ends of the dash. When fixing the gash see (see below), I smoothed in some filler to blend the cover lip to the dash. It worked fine for my tastes.
The gash below the glove compartment took more work. It would require prep to cut out the loose foam and PVC – the old Saab has the thick (maybe 1/2 in) foam covered with PVC. Below are the pics of the extended gash to allow filling and the materials used in the refurb.


After some cleaning I filled the gash with the Polyvance Urethane Supply Padded Dash Filler. It spread with a putty knife and was hard enough to be sanded when dry. I used the Eastwood prep and SEM adhesive promoter per instructions. After sanding as best as I can do these things, I taped down the dash and panel and spray painted with the SEM black interior paint for vinyl. I sprayed the entire dash face but not the new cover.
The B&I Dash Kit worked as instructed – take it slow and clean the areas that the individual pieces are to be placed. Fit was good. I used the Avalon Burlwood and still like the coloring. Original was the black vinyl.
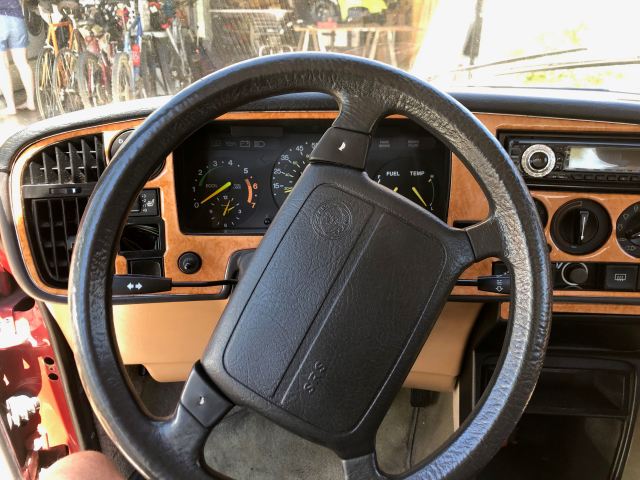
Here’s the beauty shots. You can expand out the pics to see the detail. The lower left picture is a close-up of the finished gash and smoothing of the lip at the cover and dash face. In the lower right is a detail of the ‘UNLEADED FUEL ONLY’ caution – found a black vinyl plug and an on-line stencil shop to complete the original look. (Leaded fuel!?)


Also added the Kenwood radio as replacement (and speakers that had degraded). The radio connects by Bluetooth to a phone but has an external microphone. So dropped the wiring down to the ashtray(do they still make them?) Open the ashtray to talk and access a USB cable.

Update after three years
Starting to see a couple cracks in the dash at the weak points across the top. I use a sunshade on the window almost all the time when parked. Definitely see the dash expand in the heat, ballooning in sections.

Bumper and Trim Refinish
The bumpers and trim fade in the sun. This is my second go at refinishing them – first round was several years ago. It’s amazing how the bolts holding the bumpers and the trim attachments pop right off like new. Would not happen in the midwest rain, snow and salt! Here’s a look at the before. Washing and light sanding and tape on the still-good chrome trim strips. Used Eastwood’s Plastic Resurfacer. Works well – after a few years it holds up well but not perfect.


Final result looks fine.


And the final beauty shot.
